• Skip to primary navigation
  • Skip to main content

Veglatino

Veganism from the Latino's Perspective.

  • Support Us
  • Blog
  • About
  • Contact Us
  • Disney Vegan
  • Lifestyle
  • Vegan/Vegetarian
  • Puerto Rican Guide
  • Restaurants Reviews
You are here: Home / Archives for Recipe

Recipe

Chayote Relleno

June 27, 2011 by Lucymfel

Today I decided that I was going to make Chayote Relleno. The first time I had chayote, I put sugar and tons of butter on it because it didn’t tast like anything to me. My mom put salt, pepper, and olive oil. Here is a bit more information about what Chayote is and the various ways you can prepare it.

When you look for it at the supermarket, look in the Spanish vegetable section. It should be white or green in color and look like a pear with ridges.

Chayote, Quinoa, Pink Beans

I had bought chayote recently and wanted to have it filled with vegetables and not processed soy protein. So that is exactly what I had for dinner today.

Cooking Chayote is simple; cut it in half, season some water with salt, and boil. I don’t peal the skin because the chayote will become soft enough to eat the entire thing. After it is fork tender, I cut out a hole in the middle extracting the pit. You can do a mojo isleño with onions and fill it as well.

After it was cooked I seasoned with some olive oil and sprinkle of pepper. I added cheese, cooked veggies (broccoli, cauliflower, carrots), sauce, and topped with cheese. I know I should have omitted the cheese to make it a vegan dish. I put it in the toaster oven at 400 degrees for ten minutes or until the cheese melted. You can also make a mojo isleño with onions as a filler.

You can not get any easier than that for dinner. I also made quinoa and pink beans. I have to say that the meal was healthy and excellent. For those who are vegan, omit the cheese.

Filed Under: Vegetarian Tagged With: Puerto Rican, Recipe, vegan, Vegetarian

Broccoli Slaw Marinara

March 21, 2011 by Lucymfel

This is my twist on Hungry Girl’s “Slaw and Order”

[youtube]http://www.youtube.com/watch?v=t2VpFQpYidI[/youtube]

( start at 2:59 to get right to the recipe).

My Ingredients:

1 1/4 bag of broccoli slaw
1/2 thinly sliced white onion
1/4 thinly sliced green bell pepper
1/2 cup of mushrooms
1/2 cup marinara sauce (I used Bertolli Marinara with Burgundy Wine sauce http://www.villabertolli.com/products/1012/marinara.aspx )
1/4 cup water
Salt, pepper and Parmesan cheese (or Parmesan cheese veggie substitute if you’re going completely veggie) to taste.

Procedure:

Spray non stick spray on your pan, add onions, mushrooms and peppers and let them cook through, turn stove to medium high heat add the slaw and 1/4 cup of water…let it cook for around 6 – 10 minutes depending on how crunchy/soft you want it. I wanted it more spaghetti-ish so I cooked it for 10 minutes and it still had a crunch to it. Add sauce, mix through and let warm…add a bit of Parmesan cheese mix and again. Let cool for about a minute then serve and top with a bit more parmesan cheese :).

I ate this alone and it was a huge serving for around 210 calories (give and take with the cheese) but if you do the whole bag and serve it with something else it can easily serve two people. To make it for two adjust veggies accordingly, maybe a whole onion and pepper, mushrooms is enough in my opinion mine had a lot but I’m a huge mushrooms girl..and with the sauce add little by little according to taste, I like mine sauce-y so after the 1/2 cup of sauce I added another 1/4 cup of water to thin out the sauce and not have to add more (more sauce = more calories = no no).

Filed Under: Vegetarian Tagged With: Recipe

Falafel Sandwich

February 16, 2011 by Lucymfel

photo credit

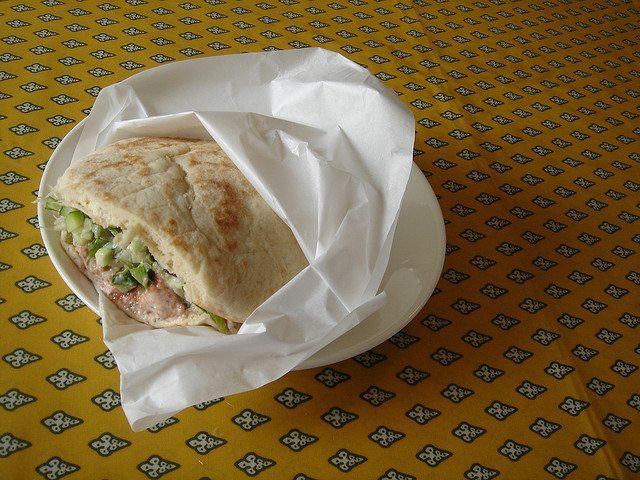
We received a link for a recipe from our friend @Analovebug for a Falafel Sandwich. Give it a try and let us know how it tastes.

prep time

30 min

total time

42 min

makes

6 servings

what you need

2 cans (15 oz. each) chickpeas (garbanzo beans), drained

1/2 cup  oatmeal

1/4 cup KRAFT Real Mayo Mayonnaise

1 small  onion, coarsely chopped

2 cloves garlic

1 tsp.  ground cumin

1/2 cup fresh cilantro, chopped, divided

1/2 cup  BREAKSTONE’S or KNUDSEN Sour Cream

2 Tbsp. tahini

2 tsp.  lemon juice

1 cup chopped English cucumbers

1 cup  chopped seeded tomatoes

1/4 cup KRAFT Greek Vinaigrette Dressing

2 Tbsp.  oil

6 whole wheat pita breads (6 inch)

make it

PROCESS chickpeas, oatmeal, mayo, onions, garlic, cumin and half the cilantro in food processor until smooth. Shape into 18 (2-inch) patties, using about 2-1/2 Tbsp. chickpea mixture for each. Place in single layer on baking sheet. Refrigerate 15 min.

MEANWHILE, mix sour cream, tahini and lemon juice until well blended. Refrigerate until ready to use. Combine cucumbers, tomatoes, remaining cilantro and dressing.

HEAT 1 Tbsp. oil in large skillet on medium heat. Add half the falafel patties; cook 3 min. on each side or until browned on both sides. Remove from heat; cover to keep warm. Repeat with remaining oil and patties.

TOP each pita with 3 falafel patties, about 4-1/2 tsp. sour cream mixture and 1/3 cup cucumber mixture. Serve immediately.

kraft kitchens tips

VARIATION

Prepare using KRAFT Light Mayo Reduced Fat Mayonnaise and BREAKSTONE’S Reduced Fat or KNUDSEN Light Sour Cream.

MAKE AHEAD

Falafel patties can be prepared ahead of time. Refrigerate up to 24 hours before cooking as directed.

VARIATION

Omit pita breads. Serve cooked falafel patties topped with cucumber mixture and sour cream mixture.

Filed Under: Vegetarian Tagged With: Recipe, Recipes, Vegetarian

Lemon Ice Cream on Raspberry Squares with Crumble Topping and Coulis

February 14, 2011 by Raul Colon

Refreshing end to a meal. Next time, a little less Ice Cream. Photo by Scott Groth

A great Vegetarian Dessert for St. Valentines day. We want to thank @thechubbycook for sharing this recipe and allowing us to post it on Veglatino. Feel free to follow him and thank him on twitter @thechubbycook or by visiting his website thechubbycook.com.


This recipe was originally published on this thechubbycook.com.

Ingredients for Lemon Ice Cream:

1 1/4 cups sugar
2/3 cup fresh lemon juice
1 tablespoon lemon zest
4 egg yolks
2 whole eggs
1/2 cup 2% milk
2 cups heavy cream

As with the recipe for the Super Dark Frozen Chocolate Custard you are going to need an ice cream maker for this recipe. If you don’t have one, be sure to call your family and friends- somebody has one that they are not using and will gladly let you borrow.

When you get your hands on one, one thing to keep in mind is that the ice cream carafe needs to be frozen for about a day before you make the ice cream. This will guarantee good results.

Okay, so add together the sugar, lemon products and the eggs in a sauce pan. Whisk them around and turn the heat to medium. Make sure that you cook these slow and low so that your eggs don’t scramble. After about five to seven minutes, you will notice that the mixture has thickened enough to heavily coat the back of a metal spoon. When this state is achieved, add in the milk products and stir until incorporated.

Turn off the heat and strain the cream mixture through a fine sieve. This step is important for several reasons- first, it removes the lemon zest that we don’t want in the ice cream. Second, it catches any eggs that might have started to scramble from getting into the ice cream, which is a good thing.

Now we need to get this mixture chilled. There are several ways to do this. First, you can leave it on the counter for an hour until it cools enough to put in the fridge. I’m not a fan of putting really hot items into the fridge- it throws off the refrigerator and increases the chance for spoilage of other items. If you don’t have the time, put together an ice bath in a larger bowl than what you poured the cream mixture into. Set the cream mixture into the ice bath and stir until the mixture is cooled. When it has cooled enough, toss it in the fridge for four to eight hours.

After it has had a chance to really cool down, toss it into your ice cream maker. Due to the amount of cream we used in this mixture, you are going to want to run this mixture in the ice cream maker for about 25 minutes. When it has thickened enough, transfer the ice cream from the machine to a freezer safe bowl. Freeze for a minimum of 2 hours before serving. Okay- the ice cream portion is done!

Ingredients for the short bread base:

1 1/2 cups all purpose flour (I used King Arthur’s)
1/3 cup extra fine sugar
1/2 teaspoon baking powder
1 egg, beaten
1/2 stick unsalted butter, melted
pinch of fine grain sea salt

Turn your oven on at 350 degrees. I used an 8X12 baking dish for my base, but my guess is that this would work in a 9X9 as well, but might need some extra time to cook because it will be thicker. I sprayed the dish with non-stick baking spray. For some reason, I love this stuff. It works every single time I have used it- nothing sticks!

Sift the flour and baking powder into a bowl. Mix in the sugar (to make sugar extra fine, toss it in the food processor for about 2-3 minutes), then the egg and the butter. Add in a pinch of fine grain sea salt (this will incorporate better than kosher salt). Mix until thick. Toss this mixture into the baking pan and level with your hand. I used the flat bottom of a glass to really pack the dough into the dish and make a flat base layer. After it has been compacted, toss into the oven for about 25 minutes. Remove from the oven and allow to cool. Nice work, the shortbread base is complete.

Ingredients for the Raspberry Puree:

3 cartons of fresh raspberries
2/3 cup sugar
1 teaspoon vanilla extract
1/2 pod vanilla seeds (optional)

Take out a bowl and add all the ingredients together. Let this sit for about an hour and then stir. The raspberries will naturally start to fall apart. Let sit for another hour if you have it, or if you don’t then stir vigorously until all the raspberries have been pureed. Now take the mixture and place in a fine mesh sieve over a bowl. Allow to drain, stirring every now and again, until most of the liquid has been removed from the berry mixture. Save the liquid and set aside. Spread the raspberry puree over the cooled shortbread base. Onto the crumbled topping!

Ingredients for the crumbled topping:

1 1/2 cups all purpose flour
1/3 cup sugar
6 tablespoons of cold butter, cut into 1/4 inch pieces

Toss all the ingredients into a large bowl. I used a potato masher to get everything incorporated together (not a ricer, a hand masher!) If you don’t want to do this, use your fingers to break up the butter to make the crumbled topping. When it looks like a bunch of little pebbles in the bowl, you’re ready to top the raspberry layer.

After you have added the topping, toss the whole shootin match back into the 350 degree oven for 45 minutes or until the crumble has taken on a golden color. Remove from the oven and let cool.

For the Raspberry Coulis, take the bowl of reserved raspberry liquid and add in 1 tablespoon lemon juice and 2 tablespoons of confectioners sugar. Mix well. That’s it.

To plate this dish, I simply cut the squares out and plopped some ice cream right on top. I used the bottom of the plate to pool some of the coulis and added a few fresh raspberries to each plate. If you want, use bowls and drizzle the coulis over the top. However you do it, this is a really refreshing and light dessert after a big meal. Enjoy!


Lover of food & everything related to it. Entrepreneur. Chef Wannabe. Food photographer.Recipe creator.

Follow him on twitter @thechubbychef and/or find more of his recipes at thechubbycook.com


Any other Recipes you would like to share for a special day like today?

Filed Under: Vegetarian Tagged With: Recipe, Vegetarian

  • Support Us
  • Blog
  • About
  • Contact Us

Copyright © 2021 | Privacy Policy(function (w,d) {var loader = function () {var s = d.createElement("script"), tag = d.getElementsByTagName("script")[0]; s.src = "//cdn.iubenda.com/iubenda.js"; tag.parentNode.insertBefore(s,tag);}; if(w.addEventListener){w.addEventListener("load", loader, false);}else if(w.attachEvent){w.attachEvent("onload", loader);}else{w.onload = loader;}})(window, document);
Veglatino.com runs on the Genesis Framework & powered by WP Engine
SQUEEZED & SWEETENED BY LIMONADE INC.